
If you are new to the magical world of candle-making, here are the most essential stages to create either a jar candle or a pillar candle.
What are the candle-making supplies?
Let’s start with the tools you’ll need for this new adventure. A candle-making kit could be helpful, but the main thing you will need is a candles making wax.
As for the rest of the needed supplies, here is a summary and an easily accessible list for your convenience:
- Cooktop or hot plate
- A water pot
- A pitcher for pouring
- 500 g candles making wax (when making a container candle, soy is a wonderful place to start)
- 1 liquid dye or diamond dye block
- 30 mL of your preferred scent oil
- Thermometer – Scale
- Stirring stick, usually glass or metal (not wood or plastic), such as a skewer stick
- 3 (three) 200 mL containers (e.g., Mason jars or tin cans)
- Wicks, glue dots, or hot glue
- Newspaper, wax paper, or other protective covering for your work surface
The 7 Essential Steps of Making Candles:

1 – Set up a double boiler
Begin by filling the pot with a few inches of water and placing it on the stove or hot plate. You’ll heat it until it’s steaming or boiling to melt the wax in the pouring pitcher.
2 – Measure out the wax
Then, either in a separate container or immediately in the pouring pitcher, weigh out your candle wax. I would suggest using one pound for three (three) 200 ml containers. If you’re intending to add scent and dye to a 450ml Mason jar, use around 5kg of wax.
When weighing out your wax, deduct the weight of your container by placing it on the scale first and “zeroing it out” by pressing the “zero” button. The wax is then added to get the desired weight.
3 – A wax-filled pouring pitcher is placed in the bath
Once you have the necessary amount of wax in the pouring pitcher, place it in the water bath to allow the candles making wax to melt. Place a thermometer in the wax to keep track of the temperature, since you will be adding colour and scent at different temperatures. You can assist the wax melt by stirring it.
4 – Set up your work area
You can prepare your containers to protect your work area while the wax melts by covering it with newspaper. Then, place your containers on the paper. You may use a glue dot (or wick sticker) to attach the wicks to the jars, or you can use hot glue instead.
If you have a big glass jar, you may need to use a stirring stick or another long tool to press the wick to the bottom of the jar, unless the opening of the container is large enough and/or you have really long fingers. Then check that the wick is centred on the bottom of the jar. Pull the wick taut, but not too tight, then clip it with a wick bar or wick holder to keep it centred. The wick holder just rests on the jar’s rim/top.
I believe you must see how your candles will appear and how they will turn out if the jars are not heated. Once you’ve mastered the basics, consider heating the jars and incorporating extra techniques or tricks into your candle-making procedure with your next batch.
5 – Add colour and scent
Turn off the heat when the wax has completely melted or reaches 85 °C. Continue to stir and then allow the candle wax to cool completely. The temperature at which you apply the dye and fragrance will vary based on the type of dye/fragrance and the brand.
Read the package to find out what temperatures to use, but typically, you add the dye at around 80 °C and the fragrance at 60 °C or less, depending on the fragrance’s flash point.
As a sampler, you may obtain a little diamond dye block, which makes it simple to measure because you only add one diamond to 0,5kg of wax. The dye colour chip, on the other hand, does not need to be measured as accurately as the wax and scent dye. To achieve a lighter colour, use less dye. More dye is used to get a deeper colour, yes it’s as simple as that! The fragrance is added at a lower temperature so that it does not burn off from the heat. Always make sure you read the label and follow the manufacturer’s instructions.
Stir after adding the dye and fragrance to ensure that it is well integrated into the wax. Before pouring your candle, ensure that the colour chip is thoroughly dissolved. The main point here is to stir continuously. However, avoid making too many air bubbles, which can damage the final condition of the candle when poured into your container. So, moderate, rather than vigorous stirring is preferable.
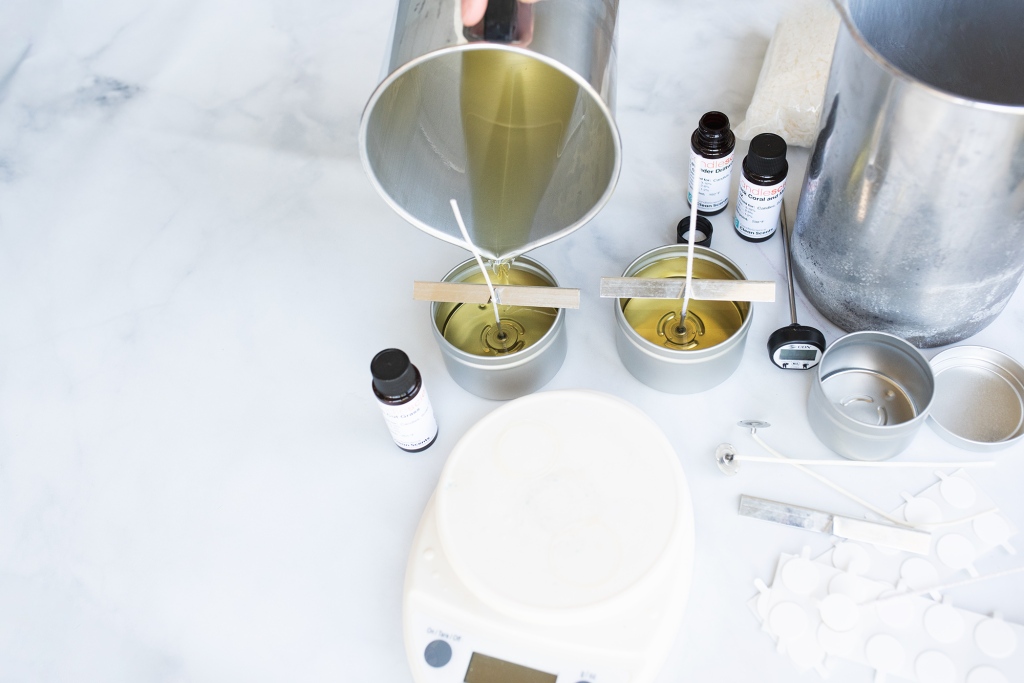
6 – Pour at 50 °C or less
Continue to monitor your temperature, and after you reach the pouring temperature, approx. 50 °C or less, pour the wax into the container(s) until the material has solidified and has a “skin” on top, or even begins to look “slushy.”
7 – Centre the wick and let it cool down
Make sure the wick is centred once the wax has been filled to the top of the container. Allow your candle to burn down and wait at least 2 days before lighting soy wax candles, but allow your candle to cure for at least 7 days for optimal results.
